
Difference between revisions of "Asphalt Shingles - Diverter Flashing"
Difference between revisions of "Asphalt Shingles - Diverter Flashing"
(→RELATED WORK BY OTHERS) |
|||
| Line 1: | Line 1: | ||
| + | {{Template:RPM Info}} | ||
| + | |||
{| class="wikitable" | style="color: black; background-color: orange; width: 100%;text-align:center" | {| class="wikitable" | style="color: black; background-color: orange; width: 100%;text-align:center" | ||
| colspan="2" | <big>'''''RoofStar Guarantee Standards''''' are <span style="color:#6495ed">'''blue-linked'''</span></big> | | colspan="2" | <big>'''''RoofStar Guarantee Standards''''' are <span style="color:#6495ed">'''blue-linked'''</span></big> | ||
Revision as of 22:05, 26 July 2021
| RoofStar Guarantee Standards are blue-linked |
Asphalt Shingle Details
 |
|
 |
|
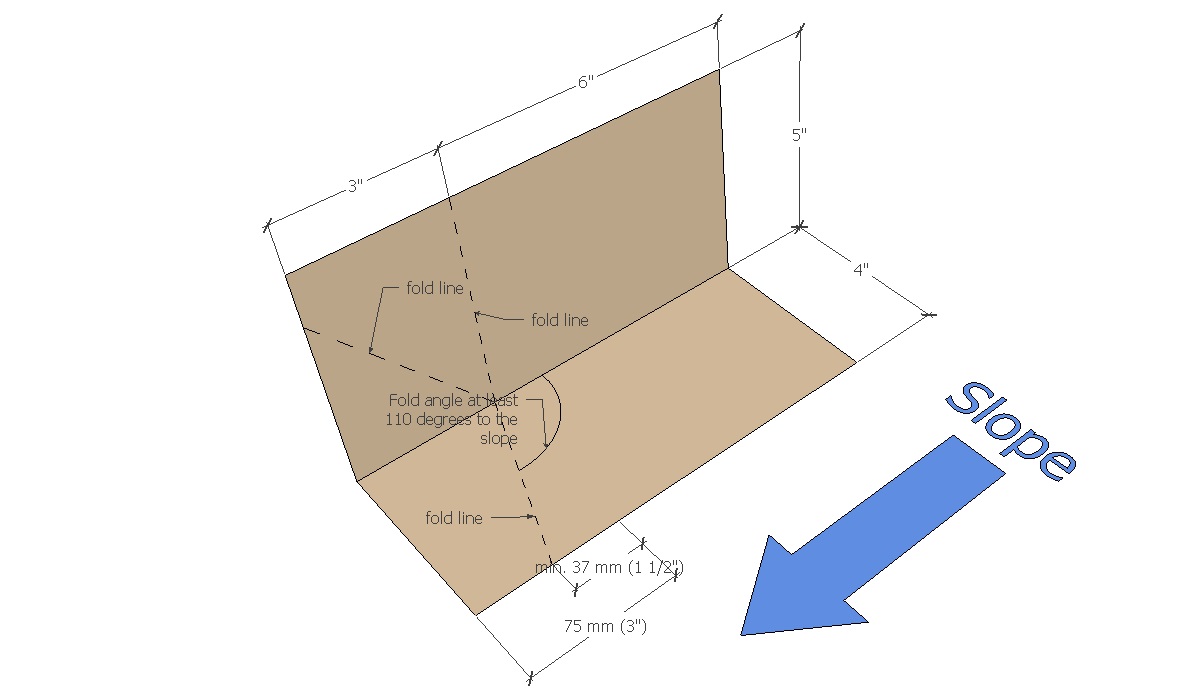
1 WORK INCLUDED
- (1) Step 1
- Use a standard 225 mm (9”) long step flashing and scribe the fold lines as shown on the illustration. Note that the down-slope upstand is bent at a 110-degree angle to the slope. No cutting is needed or appropriate; the flashing is formed with folds, bread-pan style.
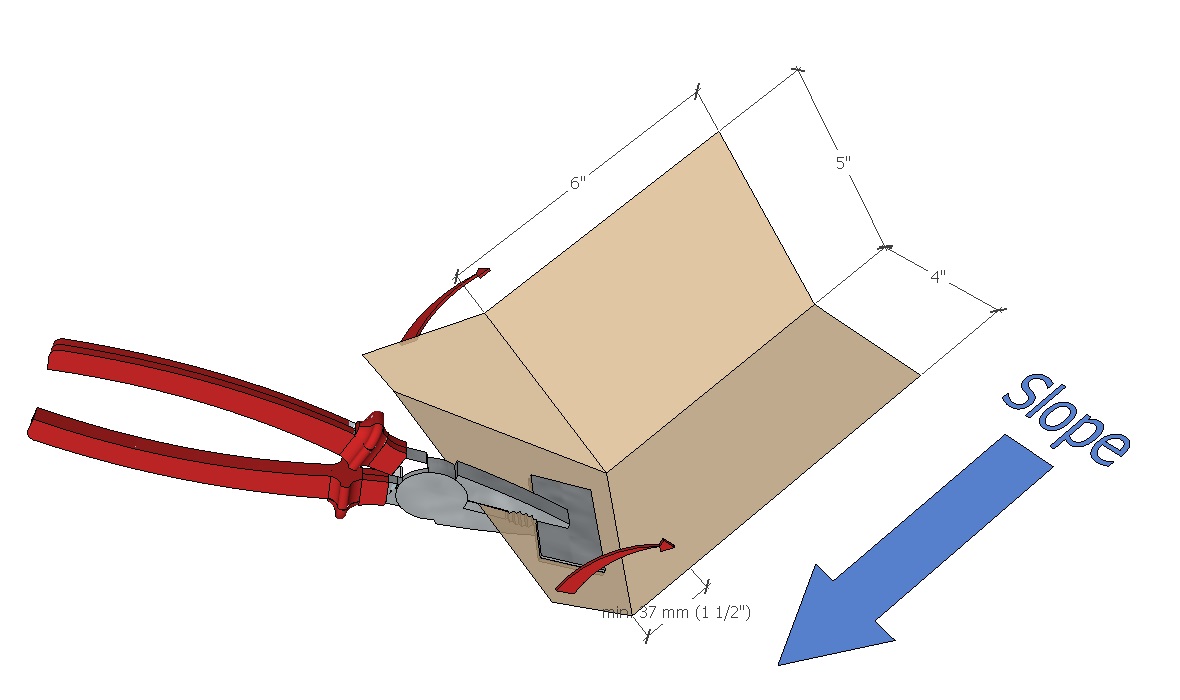
- (2) Step 2
- Fold the bottom end of the flashing as illustrated, so that the bottom upstand aligns with the vertical bread-pan fold made in the next step.
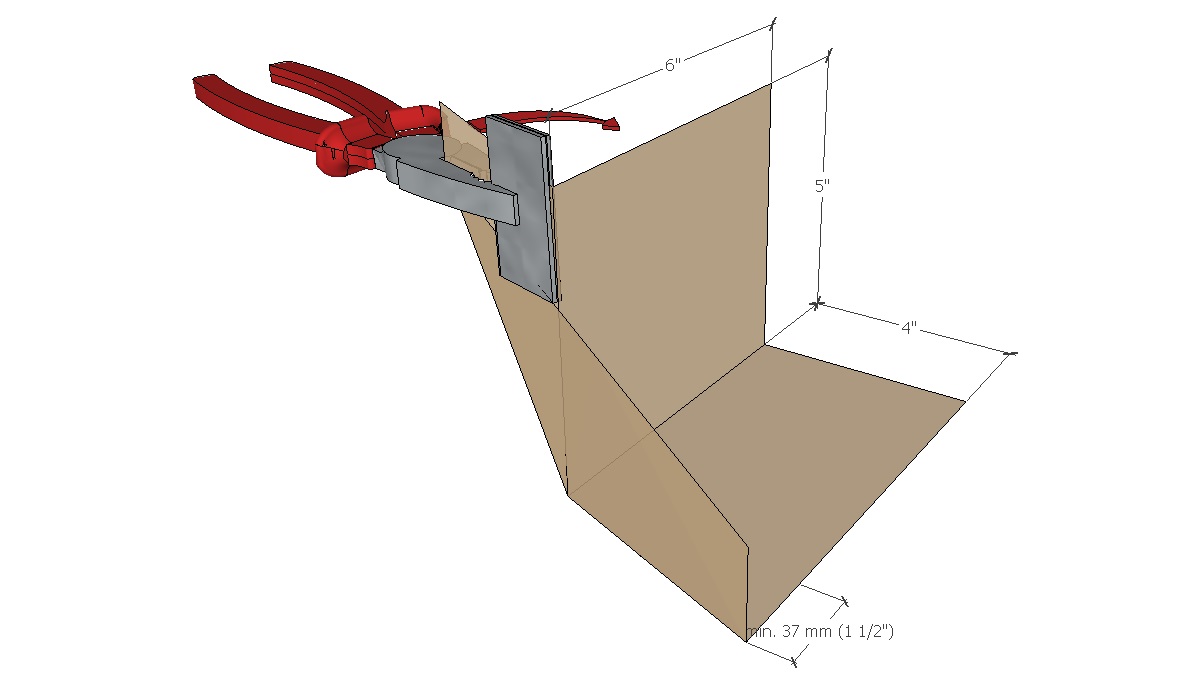
- (3) Step 3
- Fold the back flap around and behind the main upstand, bread-pan style.
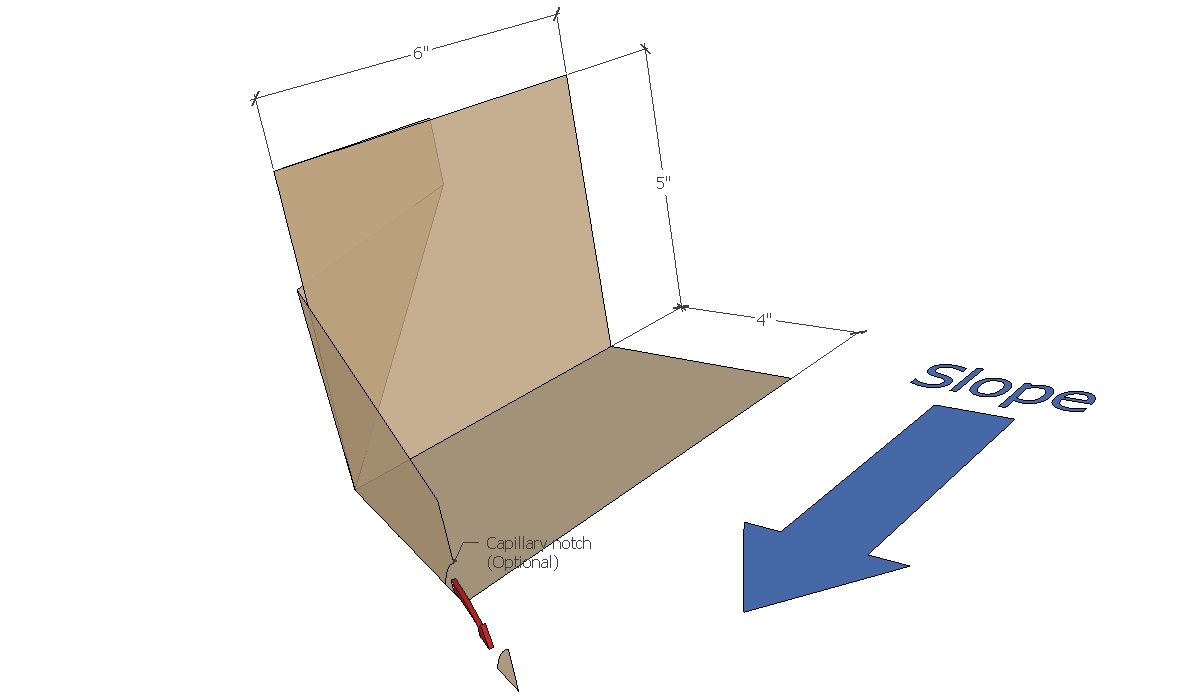
- (4) Step 4
- If required or desirable, cut a capillary notch in the bottom upstand (illustrated), and trim the upstand to suit the aesthetics of the roof.
2 RELATED WORK BY OTHERS
- None
NOTE: Refer to RoofStar Guarantee Standards for additional requirements.
Standard for Asphalt Shingle Systems