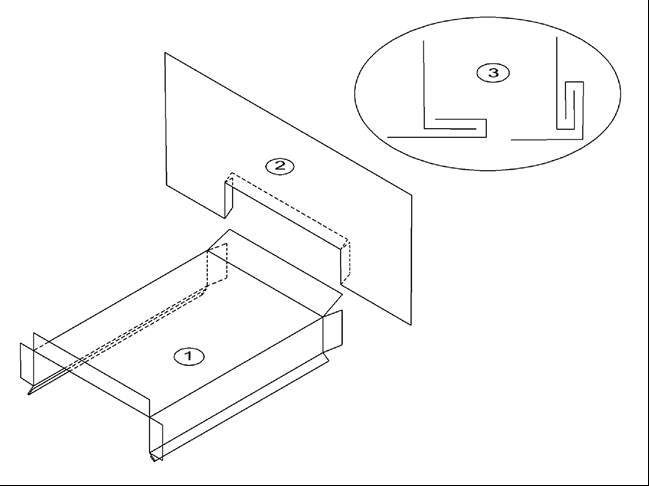
LMF Metal Cap Flashing (Parapet-to-Wall Transition - Site Formed)
LMF Metal Cap Flashing (Parapet-to-Wall Transition - Site Formed)
FABRICATION PROCEDURE
(1) Metal Cap Flashing: Cut to form a 25mm (1") wide flange for seam fabrication at cap flashing /wall transitions. Fasten outside face with continuous concealed clip-type fasteners or with two concealed discontinuous clips or cladding screws evenly spaced between seams. See RoofStar Guarantee Standard A6.10 for additional reqiurements for metal flashings.Cap flashing over 100 mm (4") in width must provide positive slope to roof area. See RGC Guarantee Standard A6.9
(2) Gusset Flange: Site fabricated a minimum of 100mm (4") wider than the top, inside and outside face of metal cap flashing. Metal gusset flange to match profile of cap flashing with an additional allowance of 12.7 mm (1/2") of material for seaming. Gusset Flange must lap under sheathing membrane and wall cladding or finish by a minimum of 75mm (3").
(3) Double Fold Seam: Site formed standing seam folded flat on back surface of wall transition gusset to form double fold seam. Optional: Install polyurethane caulking seam tape prior to forming double folded seam.
- NOTE
- Refer to the following RGC Guarantee Standards for additional requirements: A6.7 Sheet Metal Standards, A6.8 Metal Flashing Seams, A6.9 Metal Parapet / Base Flashing and reglets and A6.10 Mechanical Attachment of Cap Flashing.

