Difference between revisions of "TS Details:E4.7.4 (Tile - Roof/Wall Transition)"
Difference between revisions of "TS Details:E4.7.4 (Tile - Roof/Wall Transition)"
| Line 25: | Line 25: | ||
| − | [[Section:E. Application: Steep Slope Roofs|<i class="fa fa-chevron-circle-left fa | + | [[Section:E. Application: Steep Slope Roofs|<i class="fa fa-chevron-circle-left fa" ></i> Back to ''Slate Application'']] |
| − | [[Tile and Slate Construction Details|<i class="fa fa-chevron-circle-left fa | + | [[Tile and Slate Construction Details|<i class="fa fa-chevron-circle-left fa" ></i> Back to ''Tile and Slate Construction Details'']] |
| − | [[Section:G. Construction Details|<i class="fa fa-chevron-circle-left fa | + | [[Section:G. Construction Details|<i class="fa fa-chevron-circle-left fa" ></i> Back to ''Construction Details'']] |
Revision as of 15:17, 1 September 2016
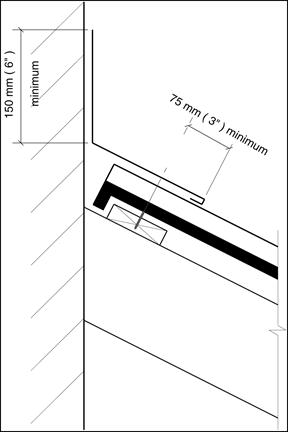
Flashings bridge the gap between field areas and any protrusions such as pipes, vents, and adjoining walls. Because these items impede the flow of water, small deficiencies can cause high amounts of water to enter the building. Proper detail work will make the difference between a successful or problematic roof.Flashing for a wall termination should lap the tile by a minimum of 100 mm (4"). Material should be the 26 ga. prepainted galvanized with S locks or standing seams to join lengths.
| RoofStar Guarantee Standards are blue-linked |
Tile Roofing Details

